In the previous blog, we learnt How to do AEM 6.5 Local Development Environment Setup from Scratch? Today we will learn How to set up a React SPA (single-page application) and create custom components using the React JS framework. This comes under the “Headless CMS” topic and also you can learn more about how AEM operates in the headless architecture.
Ok, So let’s get started with react SPA setup and component creation in AEM Headless CMS. By the way, if you want to learn about the traditional component development first, refer to this link: https://experienceleague.adobe.com/docs/experience-manager-learn/getting-started-wknd-tutorial-develop/overview.html?lang=en
Prerequisite: What do you need to know?
Assuming you will have basic HTML knowledge along with CSS and JavaScript. Also hope you know what is react, what it does and what is it used for. You can refer to React’s official website to get familiar with the concept and some basic understanding. It will also give you an idea about where it fits into the headless architecture.
Step 1: Create a SPA React Project
First of all, let us generate an SPA editor-enabled project using the AEM project archetype and then we will deploy it on the localhost server instance.
Go into your desired folder where you want to create the project and run the following command:
mvn -B org.apache.maven.plugins:maven-archetype-plugin:3.2.1:generate -D archetypeGroupId=com.adobe.aem -D archetypeArtifactId=aem-project-archetype -D archetypeVersion=35 -D appTitle="My React SPA Site" -D appId="sample-react-spa-site" -D artifactId="wfprojects-react-spa" -D groupId="com.wf.react.spa" -D frontendModule="react" -D aemVersion="cloud" -D includeExamples=y -D includeDispatcherConfig=y -D singleCountry=nOnce the above react spa aem project is created, and you run the install command, you can browse the demo application under localhost -> sites.
You may open the page in authoring mode and play around to understand the structure etc. Also, try to open the page in view as published mode and follow these items if you wish to delve a bit deeper here, else skip, and let’s proceed to the next section.
Step 2: Understand Basic SPA Integration
All the SPA component-related code is written in the ui.frontend folder. We will learn how it is mapped and integrated. Since you know that reactJs is nothing but javascript at the end of the day, hence to work with AEM, it is compiled and copied into the ui.apps module of AEM to be the final part of ui.apps deployable package.
Now, you might be thinking, ok, ReactJs code compiled and became part of the AEM package. but how does it know to map to the AEM components? Here-
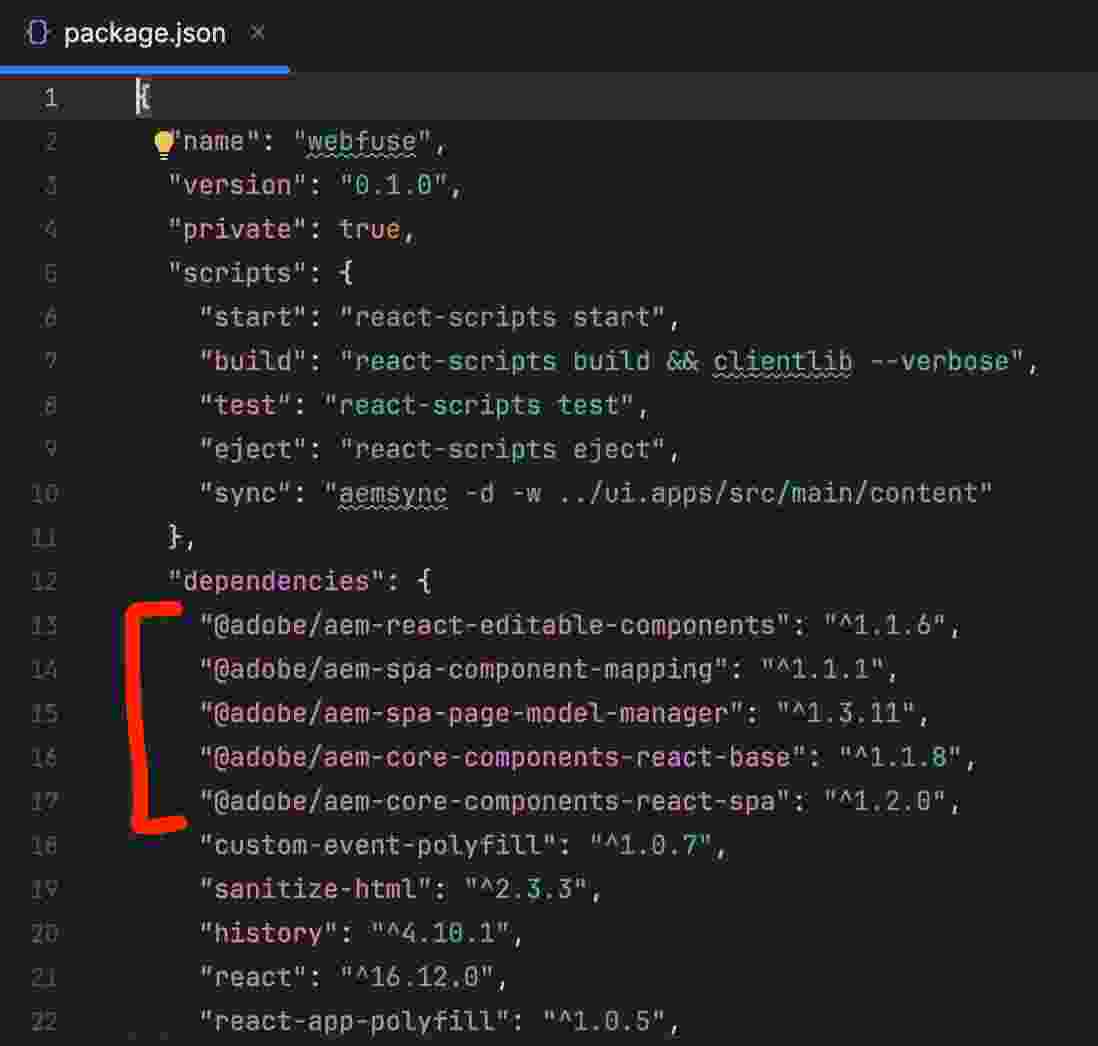
If you open ui.frontend/package.json, you will see a few packages starting with @adobe which are responsible for taking care of the core mapping and the functionality. Ref the screenshot:
You can delve deeper here if you are feeling more curious about ui.frontend module and understand few of the basic integration related details, else, let’s skip to the next section.
Step 3: Create a Static SPA Component
Let us build a Header component for our project. Follow below steps:
- Go to ui.frontend/src/components and create a file called Header.js under a new folder called Header
- populate Header.js with following code
//Header.js
import React, {Component} from 'react';

export default class Header extends Component {

    render() {
        return (
                <header className="Header">
                    <div className="Header-container">
                        <h1>Webfuse</h1>
                    </div>
                </header>
        );
    }
}- Next, go to the application entry point react js file under ui.frontend/src/App.js and add the following lines marked in bold:
  import { Page, withModel } from '@adobe/aem-react-editable-components';
  import React from 'react';
  import Header from './components/Header/Header';

  // This component is the application entry point
  class App extends Page {
  render() {
      return (
      <div>
        <Header />
         {this.childComponents}
         {this.childPages}
</div>- Now, Just skipping the npm run build part here, lets just go to the main src folder and run the package install command.
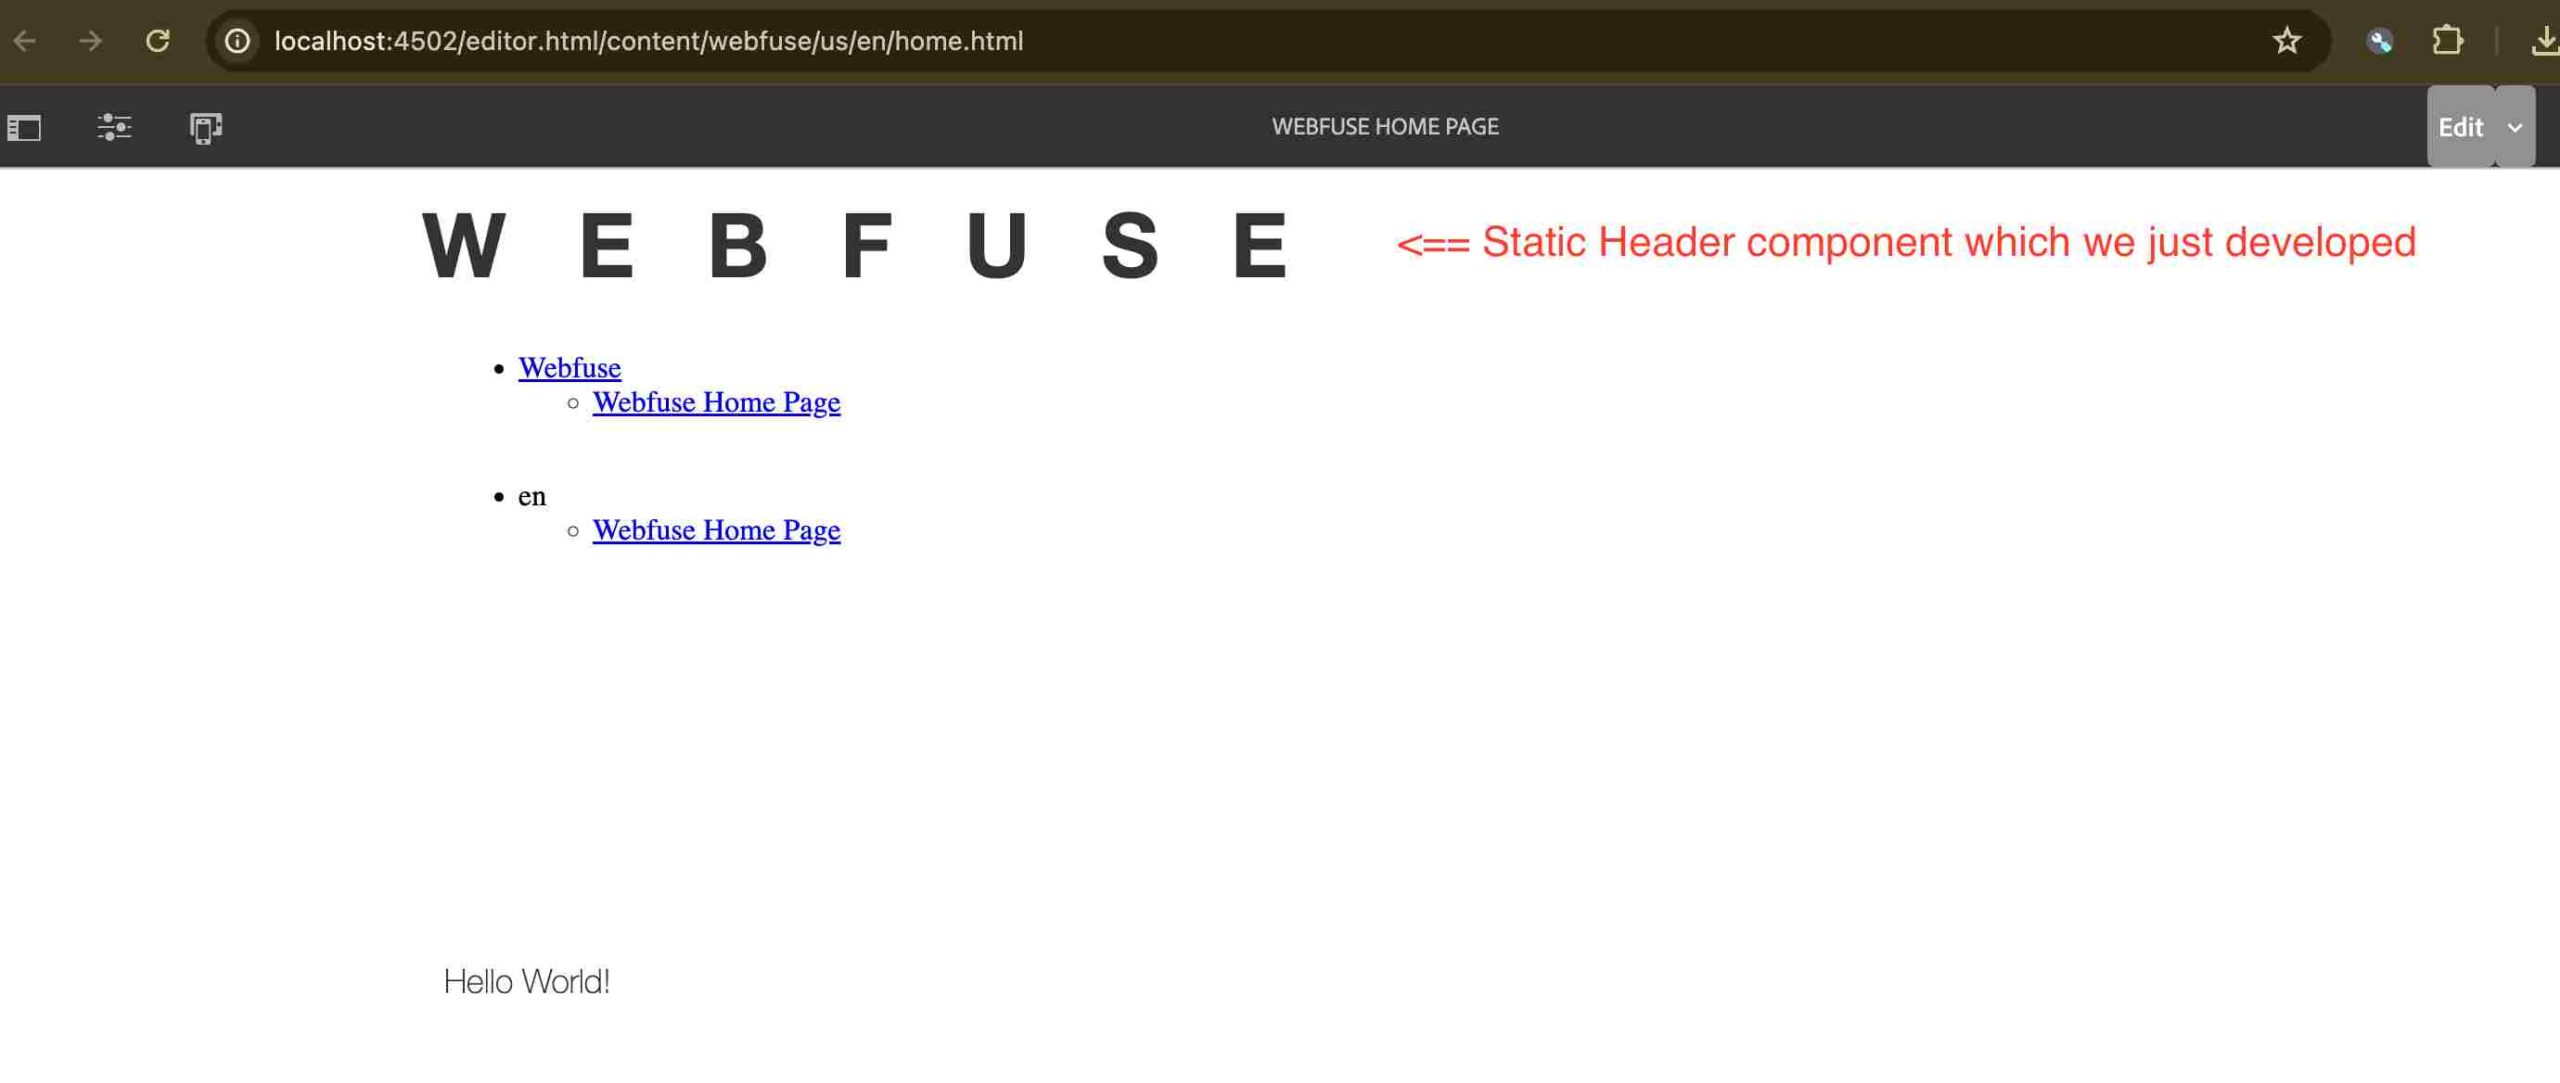
mvn clean install -PautoInstallPackageOnce package is installed, check out the changes we did in the home page. It should show like below
If you are a frontend developer going through this tutorial, you might be getting interested and curious about the other ways, this development process can be done faster, i.e. without running a full build every time to reflect the changes you have made in your code. Well you are in luck, there is a Webpack dev server available for this and it can be used for all these development processes. Refer to it here to understand it in more detail.
What next?
I will try to continue to publish further posts based on a scenario related to Weather API. Let’s assume, we have to develop a component next that calls up a free weather API based on locale and shows the current weather dynamically in the component. We would need to write some sling models, services, servlets, and editable templates, maybe a simple spring boot application as well, to simulate a middle-layer architecture. It’s going to be an exciting learning journey, so stay tuned to the AEM React SPA Tutorial series.
Conclusion
That’s all for this one, we will learn next how to map the react components to AEM with SPA Editor and how to further develop the spa components, similar to the traditional AEM components. We will also try to learn the usage and importance of the model.json network calls and the model JSON response which is significant to the component binding. Till then Ciao, take care!
Further Reference
Feel free to share your thoughts on this topic in the comments section below 👇 We would be happy to hear and discuss the same 🙂


