We will discuss here how to do AEM 6.5 local development environment setup from scratch. Just by following the below steps, you should be able to start with the very basic project setup on top of which you can easily keep building your custom requirement.
Step 1
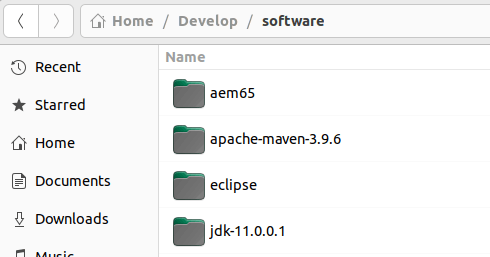
Have the following software downloaded and unzipped or installed on your PC

- Java jdk 11
- apache maven 3.9.6
- aem 6.5
- eclipse
We will not go into detail on how to set up jdk 11 and maven. It is fairly easy to add in your environment variable and make the java and mvn command work in Windows. In Linux, edit .bashrc file and edit the path variable with JAVA_HOME and MAVEN_HOME, and make the java and mvn commands work on a terminal in your system.
Step 2
Assuming your Java and Maven are working fine, verify mvn –version in a terminal and check if you get an output something like the below:

Once you have decided where to put your first code base in the local environment, go to that folder and run the following maven archetype command:
mvn -B org.apache.maven.plugins:maven-archetype-plugin:3.2.1:generate -D archetypeGroupId=com.adobe.aem -D archetypeArtifactId=aem-project-archetype -D aemVersion=6.5.0 -D frontendModule=react -D includeExamples=y -D includeDispatcherConfig=y -D singleCountry=n -D archetypeVersion=47 -D appTitle="My Demo Site" -D appId="mydemosite" -D groupId="com.mydemosite"
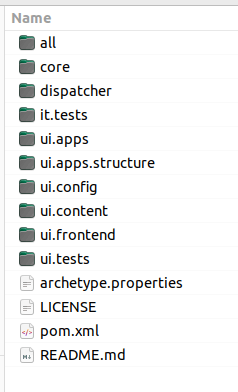
Once the above command runs successfully, you will see the following folder structure created in the folder where you ran this command.
Note that in the above mvn command to generate the initial codebase from the archetype, we used -D frontendModule=react which produced the ui.frontend folder. Likewise, there are several other options you can select and append in the mvn archetype command as per your requirement. A full list is available here: https://experienceleague.adobe.com/docs/experience-manager-core-components/using/developing/archetype/overview.html?lang=en#available-properties
Step 3
Once you have achieved the above file structure, open a command prompt or terminal and punch in the following command at the root
mvn clean install -PautoInstallSinglePackageThe above command will do a clean install and also install the final package on AEM. Make sure your AEM is up and running. To launch your AEM instance, go to the AEM folder and either double-click on the crx-quickstart.jar or if that doesn’t help, run the following command on a terminal to launch the AEM server
java -jar cq-quickstart-6.5.0.jarMore mvn commands to build and install the codebase on the AEM server are available here: https://experienceleague.adobe.com/docs/experience-manager-core-components/using/developing/archetype/using.html#building-and-installing
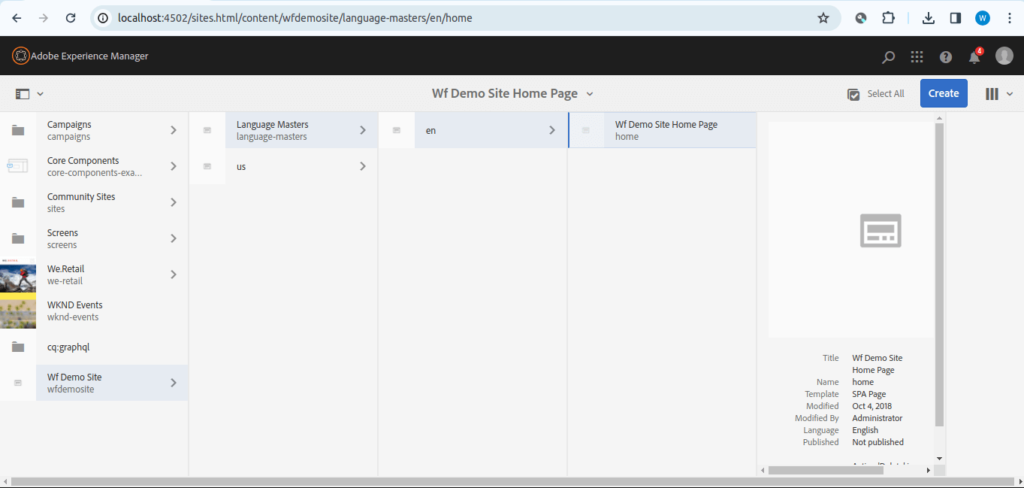
Once this clean install command runs successfully, you can go to your AEM server in the local development environment and browse the newly installed demo site:

You can select and edit the sample home page. However, you will not see anything when the page opens because we have not created any components yet like header, body, footer, etc which we can configure in the editable template and so forth. we will learn that in the upcoming tutorials.
Step 4
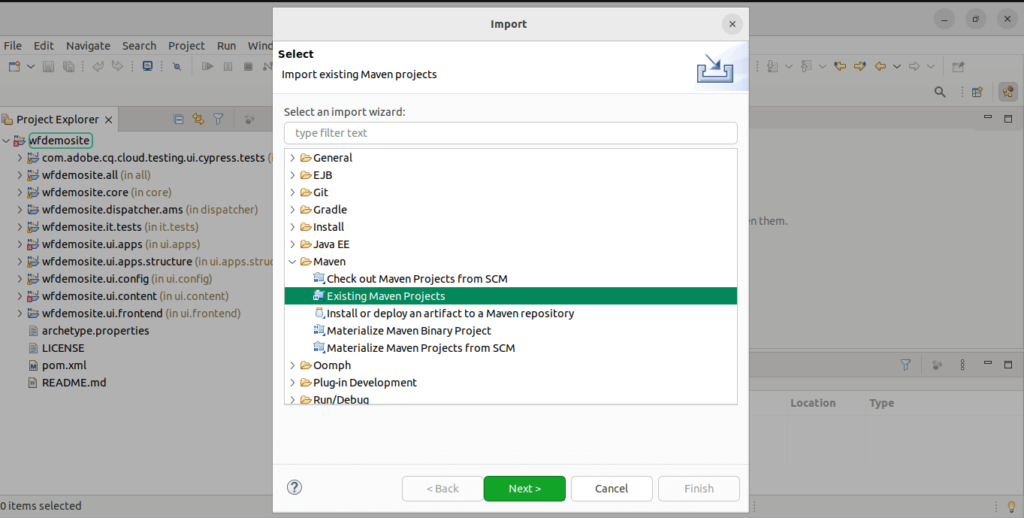
Let us try to import the code base in the Eclipse IDE and go through the auto-generated or the boilerplate code which helped in creating the sample site structure.
Open Eclipse, import the existing maven project, and select the root folder of the above-generated code base.

Once you start going through the code, you will find some sample Models, filters, listeners, schedulers, and servlet classes under the project’s core module.
You will also see, ui.content, ui.frontend, ui.config, it.tests, and most importantly ui.apps folder. All of these modules are brought together to make a final package after building the project which is a .pkg file and once that pkg file is installed on the AEM server, we are able to see the demo site working and functioning as per the code and classes which has been written.
Further Reference
- Official website for reference: https://experienceleague.adobe.com/en/docs/experience-manager-learn/foundation/development/set-up-a-local-aem-development-environment
Feel free to share your thoughts on this topic in the comments section below 👇 We would be happy to hear and discuss the same 🙂


One thought on “How to do AEM 6.5 Local Development Environment Setup from Scratch?”
Hi WebFuse, Please bring the next part soon! Your tutorials are easy to follow and always up to date!